
Review · SOUTH COAST DAY TRIPS
Vik: Guided Glacier Hike on Sólheimajökull
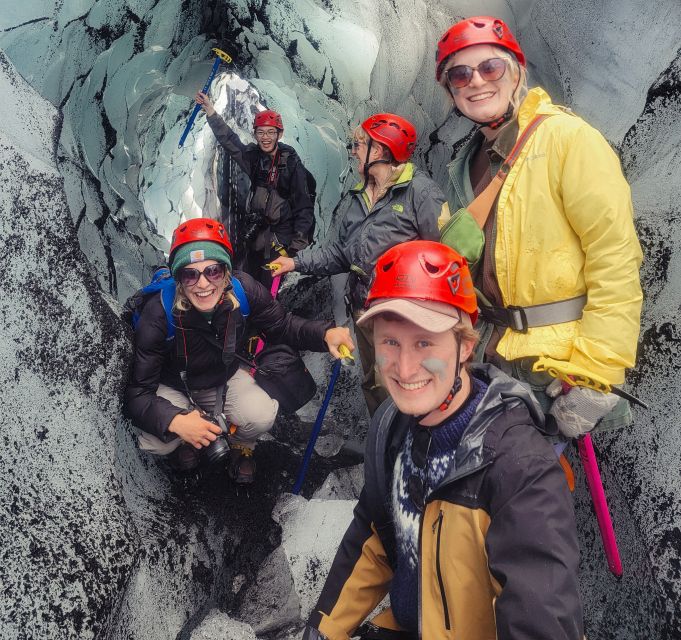
Solheimajokull feels like another planet under your boots. This guided glacier hike on one of Iceland’s bigger ice outlets stays non-technical, but it still delivers the real adrenaline of walking on ice, with gear, route guidance, and plenty of time to look around. I love that the guides focus on safety and equipment first, then switch to stories and scenery once you’re actually on the glacier.
My second favorite part is the variety of what you’ll see up close, from icy walls and icicles to dark ash streaks and (on the right route) ice cave type features. One thing to plan for: you’ll need real hiking boots that fit glacier crampons, and this hike is not a good match if you’re pregnant or have mobility limitations.
In This Review
- Key glacier-hike takeaways
- Solheimajokull, the easy-to-access glacier that still feels wild
- Price and value: what you pay for at $120 per person
- Meeting Solheimajökull: timing, where to park, and what to look for
- Gear up for the ice: crampons, boots, harness, and the ax
- What you do during the 3 hours: from base camp to glacier water and back
- 1) Base camp, equipment, and the route talk
- 2) Crossing the murky lagoon area to the glacier surface
- 3) Walking on the glacier: icicles, ice walls, crevasses, and the possibility of ice caves
- 4) Meltwater streams for refills
- 5) Higher viewpoints, big-sky horizons, and photo stops
- Ice colors, ash streaks, and how to get the best photos without slowing the group
- Guides: trained safety leaders and the role of pacing
- Who should book this glacier hike, and who should skip it
- Getting your logistics right: transport, what to pack, and what the tour does not include
- Should you book the Vik Sólheimajökull guided glacier hike?
- FAQ
- Where do I meet for the Sólheimajökull glacier hike?
- What time should I arrive?
- How long is the hike?
- What gear is included?
- What should I bring?
- Are snacks and drinks included?
- What languages are available?
- Is this hike suitable for kids or pregnancy?
Key glacier-hike takeaways
- Non-technical, guided walking on accessible glacier slopes, so you spend less time worrying and more time looking
- Full safety kit included: harness, helmet, crampons, and an ice ax
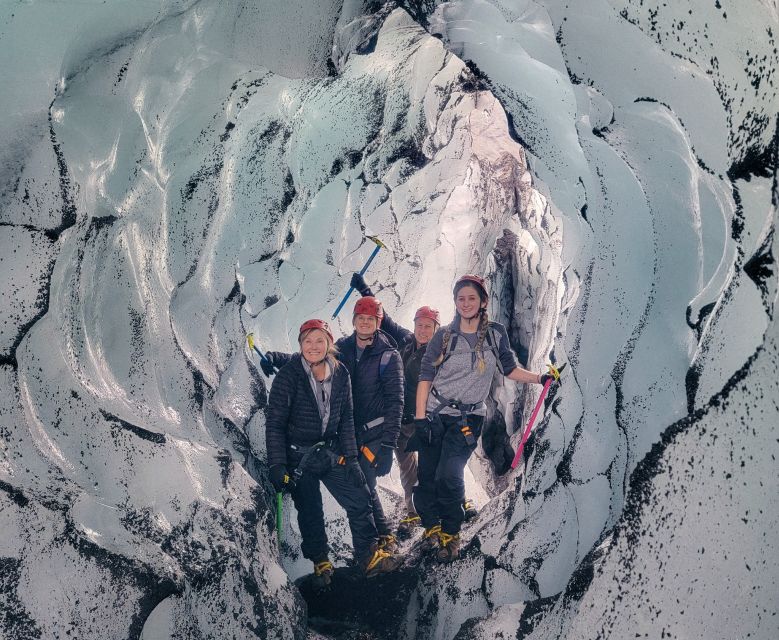
- Great “Iceland in color” photos: white ice veined with black ash and bright blues in the right light
- Refill at freshwater melt streams during the hike, so you can keep hydrated
- Small-group feel shows up often, with guides adjusting pace for different comfort levels
More of the south coast run, from black sand to waterfalls

Solheimajokull, the easy-to-access glacier that still feels wild
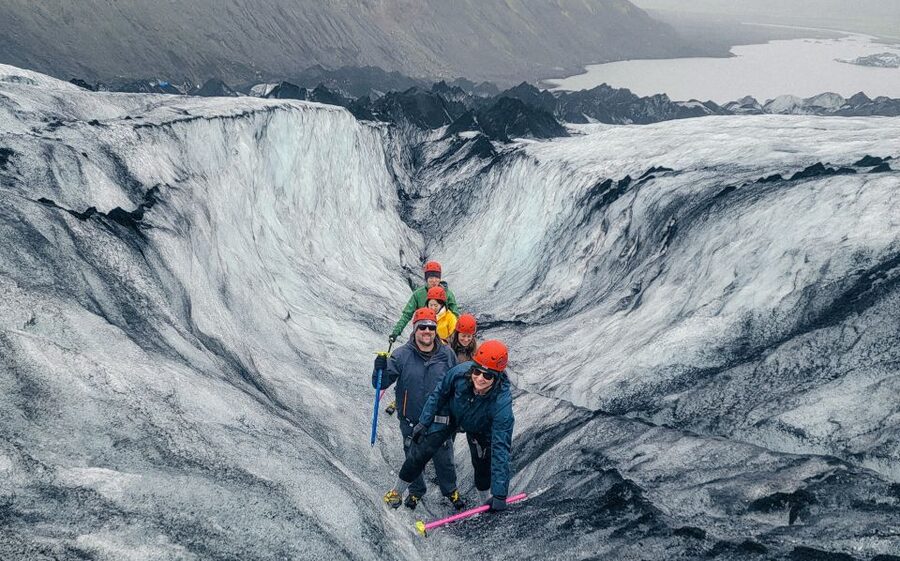
Sólheimajökull sits in Iceland’s south and is an outlet of the much larger Myrdalsjökull ice cap. That matters because it gives you a glacier hike that feels big and dramatic without demanding advanced climbing skills. In other words, you get the real “top of the world on ice” sensation, but you’re not suddenly in a technical rock-and-rope situation.
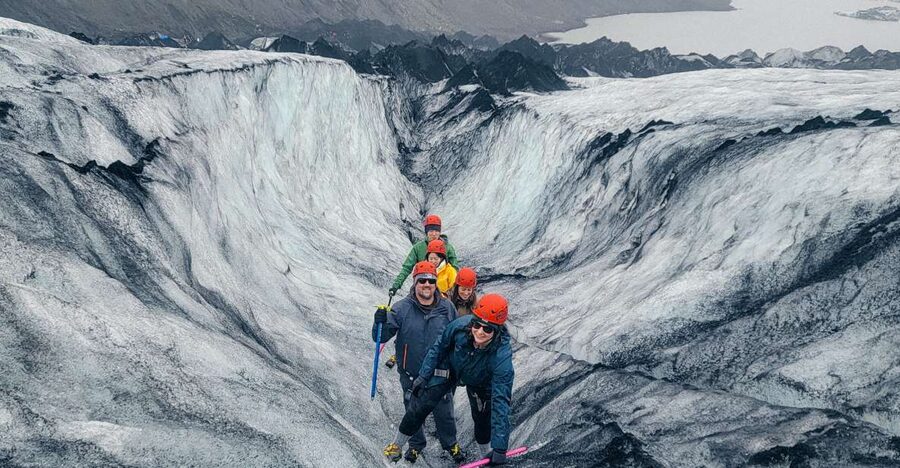
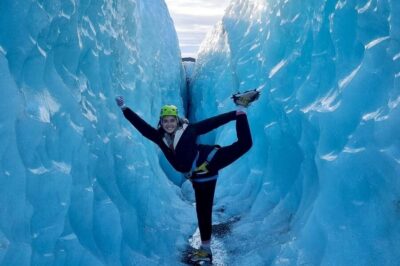
What you’ll notice first is how the glacier changes with every step. You’re not just walking across white snow. You’re moving through a working ice landscape: the pale surface can be laced with dark volcanic ash, and the ice can pick up strong blues where the light hits. On clear days, the views expand too, with dramatic mountains, the Westman Islands, the black sands of the South Coast, and lava fields stretching into the distance.
This tour is also designed to make you feel oriented. You start at base camp by the glacier, get dressed in gear, then follow your guide along the route, including a pass by a murky glacier lagoon before you reach the snowy surface. That setup helps even if you’re nervous at the start, because you know what comes next.
Price and value: what you pay for at $120 per person
At $120 per person for about 3 hours, this is not a budget activity. But it’s also not just paying for scenery. You’re paying for the parts that make glacier walking possible: a trained guide, and the key safety equipment that most people don’t own.
Here’s what’s included:
- a private guide
- safety gear: harness, helmet, crampons, and an ice ax
And here’s what you handle:
- snacks and beverages
- transportation to the meeting location
When I look at value for glacier tours, I think about three things: safety setup, time on the ice, and whether you can actually get close to the features. This tour checks those boxes because you’re not “driving by” the glacier. You’re walking on it, in the right gear, with someone who can keep you on the safe line while you take photos and refocus your brain on the ice around you.
If you’re also driving your Iceland route (most people are), you’ll need to budget time to reach the glacier parking area near Vik. But once you’re there, the experience is straightforward.
Meeting Solheimajökull: timing, where to park, and what to look for
Your meeting point is the parking lot at Solheimajökull Glacier, near Ring Road (Highway 1) just off the road. The guide will have the David the Guide logo on their gear. Arrive at least 20 minutes early. That buffer matters because you’ll get a proper explanation before you start gearing up.
One practical note from what I’ve seen firsthand on hikes like this in Iceland: roadside meeting points can be easy to misread in wind and rain. So even if you’re sure you’re at the right parking area, take a quick scan for the logo and gear before you assume everyone else is already ready.
If you’re the type who likes to show up, breathe, and be ready before stepping into a new environment, you’ll like this part. If you tend to rush, you may feel flustered before the glacier even starts.
More crampon days, from gentle walks to roped climbs
- Skaftafell: Ice Cave Tour and Glacier Hike★ 4.5 · 1,746 reviews
- Sólheimajökull: Guided Glacier Hike★ 4.7 · 1,123 reviews
- Sólheimajökull Glacier Hike – Adventure in a Small Group★ 5.0 · 799 reviews
- Solheimajokull Glacier 3-Hour Small-Group Hike★ 5.0 · 501 reviews
- Sólheimajökull Glacier Hike – Small Group Blue Ice Adventure★ 5.0 · 497 reviews
Gear up for the ice: crampons, boots, harness, and the ax
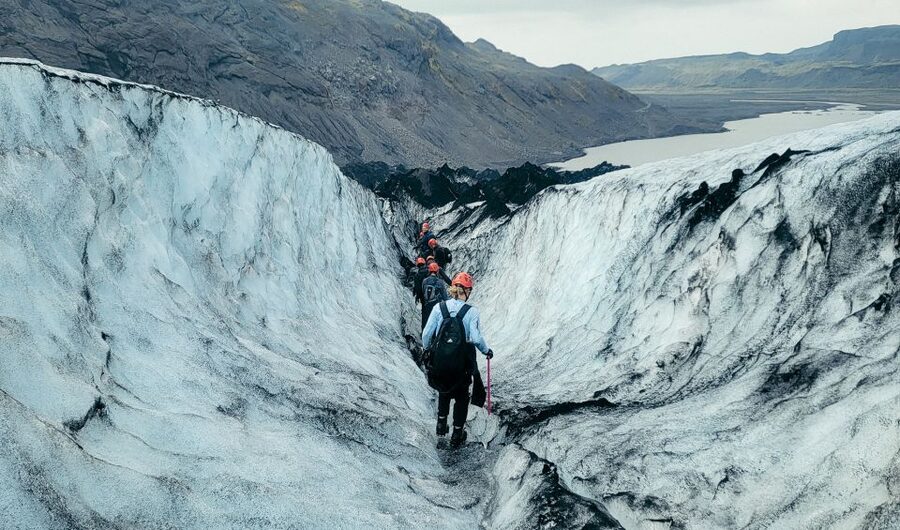
This is the section that makes the tour either smooth or stressful. The glacier tour requires hiking boots because athletic sneakers may not fit properly with the crampons. Your feet need a stable setup. If you show up in squishy shoes, the crampon fit can be the difference between confidence and constant worry.
Once you arrive, your guide will dress you in:
- a harness
- a helmet
- a pair of crampons
- an ice ax
Then you get a route and equipment briefing. That briefing is more than formalities. It’s what helps you walk naturally on ice without turning the experience into a cautious shuffle. Guides also explain how to move safely and what to watch for so you can enjoy the walk instead of fighting your footing.
If you need boot rental, the tour information says you should contact the activity provider ahead of time. I’d treat that as essential, not optional. Getting the right boots is the fastest way to make the hike feel doable.
What you do during the 3 hours: from base camp to glacier water and back
This tour is built like a guided loop of learning and awe, with enough time on the ice to feel like you actually did something, not just posed for photos.
1) Base camp, equipment, and the route talk
You start at the base camp area at the foot of Sólheimajökull. The first phase is all about getting safely equipped and understanding the plan. Your guide will brief you on the route and how the equipment works, then lead you from the base area toward the glacier’s walking zones.
This is also where your guide sets your pace expectations. Several guides named in past groups, including Susanna, Önundur, Elias, Kamila, and Agnieszka (Agnès), are described as calm and attentive, with clear instructions. Even if you’re not a confident hiker, that kind of coaching helps you relax into the walk.
2) Crossing the murky lagoon area to the glacier surface
Before you get to the main snowy surface, you’ll walk around a glacier lagoon area, described as murky. This portion is likely less scenic than what comes later, but it’s important. It’s part of how the guide gets you onto the right part of the glacier safely.
What I like here is that you’re not thrown onto the ice immediately. You warm up to the gear first. You also get a feel for how crampons change your stride.
3) Walking on the glacier: icicles, ice walls, crevasses, and the possibility of ice caves
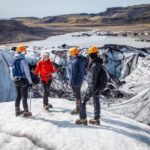
Once you’re on the glacier, the pace stays non-technical and focused on viewing. You’re walking among formations like:
- glistening icicles
- towering ice walls
- deep crevasses
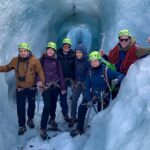
- and sometimes ice caves type areas, depending on the route and conditions
The tour also includes explanation. Your guide will talk about how glaciers form and why Iceland is so known for them, including the dangers glaciers present and what you can do to protect them.
Even if you don’t become an instant glaciology nerd, the explanations make the visual details click. You start noticing why the ice looks the way it does, where dark ash comes into the story, and why glacier environments constantly change.
4) Meltwater streams for refills
As you hike, the tour info says you can refill your water bottle in pure freshwater streams as the glacier melts. That’s a small detail, but it’s practical. It also means you’re less likely to feel “stuck” with an empty bottle halfway through, which is common on hikes where you pack water but then get delayed.
Still, bring your own bottle. Snacks and beverages are not included.
5) Higher viewpoints, big-sky horizons, and photo stops
The higher you ascend, the more dramatic the views become. If the weather is clear, you can look over mountains, out toward the Westman Islands, and down toward black sand and lava formations on the South Coast.
Photo time matters on glacier hikes because the light changes fast. Your guide will also take photos of you and your group at picturesque spots, which is a real convenience. Trying to set a camera up while wearing crampons and an ice ax is not a fun plan.
Ice colors, ash streaks, and how to get the best photos without slowing the group
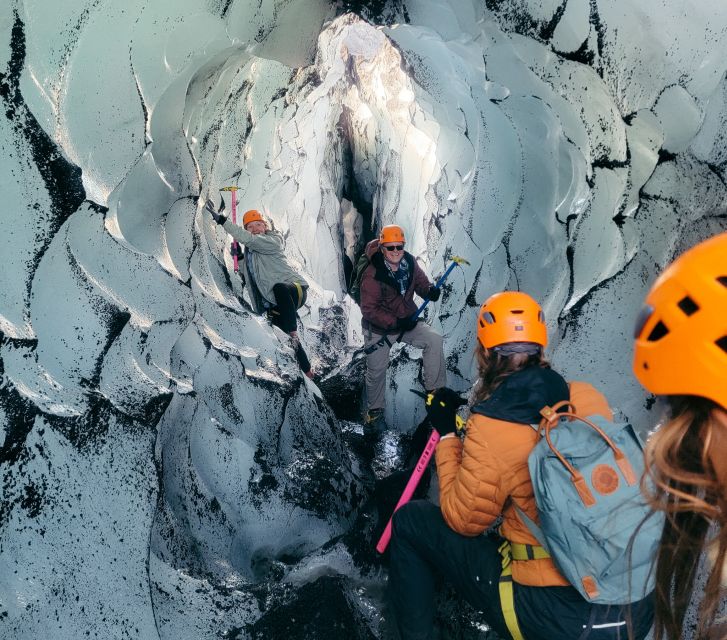
Glacier photography can turn into chaos fast. The key is to balance stillness with safety. Here’s what helps on a hike like this.
First, pay attention to the ice colors your guide points out. The information provided emphasizes striking contrasts: white snow with black ash from past eruptions, plus bright blues when light hits the ice. That contrast is what makes your photos look like Iceland instead of just “snow.”
Second, use the stops your guide plans. Guides are trained to manage movement and safety. Several guides are also praised for taking time at good photo spots without making the group feel rushed.
Third, ask your guide for a simple best-angle suggestion before you shoot. A quick orientation step prevents you from spending ten minutes fiddling with your camera while you stand where the ground is more slick or uneven.
One more practical tip: dress warm enough that you can enjoy standing still. Many people focus on the hike part and forget that your hands will get cold while holding a camera.
Guides: trained safety leaders and the role of pacing
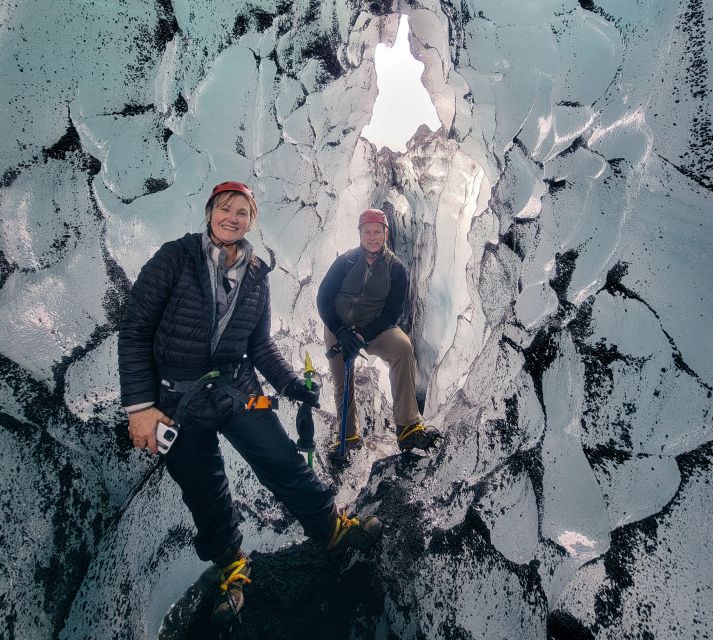
A glacier hike is equal parts gear, terrain reading, and pacing. The pace you experience matters because it changes how much you notice and how comfortable you feel.
In the feedback you shared, guides like Önundur, Elias, Norbert, Kamila, Jon, and Agnes are repeatedly described as calm, friendly, and attentive to safety and comfort. One person noted their guide moved at a pace that allowed them to look around and enjoy the ice while still keeping the hike efficient.
There’s also an important balancing point. One set of feedback says the tour was amazing and safe, but that the scientific explanations could be more accurate for people who want deeper glaciology and climatology. My advice if that’s your style: ask questions early, and if your guide doesn’t go super technical, pivot to learning what you can from what they do cover.
If you’re traveling with mixed skill levels, this kind of patient coaching is exactly what makes the difference between a scary hike and a confidence-building one.
Who should book this glacier hike, and who should skip it
This is a great pick if you:
- want an ice experience without technical climbing
- enjoy walking in nature with strong scenery rewards
- like having a guide do the safety math so you can focus on the views
- want good photo opportunities and explanations while you’re on the glacier
It’s not for you if:
- you have mobility impairments
- you’re pregnant
- you’re bringing children under 8
Also, be realistic about weather. The area around Sólheimajökull can be wet and windy, and you’ll be on ice. A review specifically calls out the need for warm, waterproof clothing and shoes since some areas can be wet.
If you’re coming from a full Iceland day of driving and stops, treat this as a “get ready, gear up, then focus” activity. Don’t schedule it as a rushed side quest.
Getting your logistics right: transport, what to pack, and what the tour does not include
Transportation is not included, so plan on driving yourself or getting there by your own arrangements. The meeting point is roadside near Ring Road, so it’s convenient once you know where to pull in.
Pack like you’re hiking in cold, wet conditions even if it looks fine at the start:
- hiking boots required (not just sneakers)
- warm layers and waterproof outerwear
- a water bottle (since you can refill on the hike)
- snacks for before or after (since they are not included)
And keep in mind that your time is built around a 3-hour glacier experience. If you arrive late, you can cut into the briefing and that can raise stress levels before you even step on the ice.
Should you book the Vik Sólheimajökull guided glacier hike?
I’d book it if you want a glacier experience that feels real, scenic, and doable, with safety equipment handled and a guide who helps you relax into the terrain. The biggest reasons are practical: you get crampons, harness, helmet, and an ice ax, and you spend real time on the glacier seeing formations you would not find alone.
Skip it if your schedule or body can’t handle cold and uneven ice walking, or if your situation falls into the restrictions like pregnancy, mobility limitations, or kids under 8.
If you do book, arrive early, wear proper boots, and dress for wet cold. Then take your time on the ice. This tour is the kind where the views don’t just happen, they reveal themselves as you walk.
FAQ
Where do I meet for the Sólheimajökull glacier hike?
You meet in the parking lot at Solheimajokull Glacier, near Vik, just off Ring Road (Highway 1). The guide will have the David the Guide logo on their gear.
What time should I arrive?
Arrive at least 20 minutes before the starting time so the guide can explain the tour and go over the gear.
How long is the hike?
The duration is about 3 hours.
What gear is included?
A private guide and safety equipment are included, including a harness, helmet, and crampons, plus an ice ax.
What should I bring?
Bring hiking boots. Hiking boots are required, since athletic sneakers may not fit the glacier crampons.
Are snacks and drinks included?
No. Snacks and beverages are not included, so plan to bring what you need.
What languages are available?
The live tour guide is in English.
Is this hike suitable for kids or pregnancy?
It is not suitable for children under 8 years old, and it is not suitable for pregnant women or people with mobility impairments.
More Tour Reviews in Vik
Glacier Walks and Climbs Nearby
South Coast, More Ways to Do It

More Vik write-ups from our desk
- Private Ice Climbing on Sólheimajökull
★ 5.0 · 3 reviews - Highland Snowmobiling Tour in Southern Iceland
★ 5.0 · 3 reviews - Easy Hike on Sólheimajökull Glacier
★ 5.0 · 3 reviews - Exclusive Ice Climbing Experience on Sólheimajökull
★ 5.0 · 3 reviews - Þórsmörk Buggy Adventure Tour in Southern Iceland
★ 5.0 · 4 reviews - Hvolsvöllur: Private Thorsmork Guided Day Hike by Super Jeep
★ 5.0 · 4 reviews
South Coast Day Trips, compared.
 ★ 4.8Reykjavík: South Coast Waterfalls, Black Sand & Glacier TourFrom $12611,030 reviews
 ★ 5.0Iceland South Coast Full Day Small-Group Tour from ReykjavikFrom $1395,988 reviews
 ★ 4.5South Coast Day Tour Black Sand Beach & Waterfalls from ReykjavikFrom $1092,697 reviews
 ★ 4.6South Coast Classic: Full-Day Tour from ReykjavikFrom $1172,457 reviews
 ★ 4.6From Vik: Katla Ice Cave and Super Jeep TourFrom $1942,110 reviews
 ★ 4.6Full-Day South Coast, Black Beach & Waterfalls TourFrom $1261,721 reviews
★ 4.6From Vik: Katla Ice Cave and Super Jeep TourFrom $2301,310 reviews
★ 4.6Full-Day South Coast, Black Beach & Waterfalls TourFrom $1261,721 reviews
★ 4.6From Vik: Katla Ice Cave and Super Jeep TourFrom $2301,310 reviews
 ★ 4.8Reykjavik: Glacier Hike, Waterfalls and Black Sand BeachFrom $1861,285 reviews
Browse the lists this tour appears in